Tag Archives: Drawings

Portrait drawing of Bob Dylan, The Never Ending Tour

Portrait drawing of Bob Dylan another cool drawing of his Bobness ( The never ending tour) to add to my collection. Like most things I do, there has to be a reason.

Portrait drawing, why Bob Dylan?

Let me tell you a story about a man who started work at 14 years of age, he was employed to work on the building of the Anglican Cathedral in Liverpool, the United Kingdom. This building was officially started in 1904 and ended in1978 after this man retired. This man worked his whole life in the same job, in the same place, for 51 years at least. I can’t remember his name so I can’t find an image to do a portrait drawing of him but I can find Bob Dylan.

Portait drawing Bob Dylan Drawings and the never ending tour.

His Bobness (Bob Dylan) has been doing this also. He was about 20 years old when he hit the New York music scene in 1961 and now 70, a grand total of 50+ years. If you take into account he was forming bands when he was in school, at a time when young people left at 14 or 15 years of age, then it might be 55 or more years.

His Bobness is still at this time, (2011) performing a stage performance on a regular basis and has been entertaining for the past 50+ years. Is that a good enough reason, to do a portrait drawing of Bob Dylan?

Regardless of any cash they did or didn’t make doing their life’s work, it must be seen as an achievement of the highest order, 50+ years doing the same job and being successful at it, is an outstanding achievement.

Bob Dylan has been on a never ending tour all his life having taken a little time off, now and then with sickness, as happens to us all. He tells us that he is just a song and dance man, nothing more, nothing less. One who just sings songs and is not prepared to wear anybody else’s crown. An entertainer, just like Arthur Lee or Julian Beever, artists all of them, so I did this portrait drawing, titled, The Never Ending Tour. Surely it was a worthy cause and good enough reason to do it?

The Never Ending Tour.

The first thought when doing this portrait drawing or perhaps even before I did the drawing, was I did not want to just copy a picture of Bob. That would just be a copy of someone else’s portrait and would not say very much more about the man or his life.

I spent a while doing some quick portrait drawing of Bob trying to find some ideas and get a feel for the features of his face. This is something I often do when portrait drawing as do lots of other artists. I also looked at hundreds of pictures of the man on line, in magazines and books.

Luckily many of my friends are fans of him so there is an abundance of material around me. These people are also like encyclopedias on the man, so I could find out lots of information about him. This helped me build up and hone in on this knowledge base to inform my thinking.

This also gave me plenty of opportunity to discus these ideas and get some feed back from real human beings. As well as what was going on inside my own head.

If you don’t put anything into the box then you are not going to get anything out of it, I always think.

Bob Dylan like many Americans during the 60s had idolized, Woody Guthrie, an American singer, songwriter and folk musician. Woody it seems was a man with a wonder lust, a traveling man, who jumped trains and lived as best he could, at times singing for a nickel or a dime. Bob Dylan perhaps because of the influence of his idol was much the same and spent some of his time with Woody, after seeking him out in New York during the last years of Woody’s life.

During both Wood’y and Bob’s time trains where a big and important part of a traveling man’s life. For both men there would have been a great deal of time spent around trains and stations. The rail road had to be a strong feature and influence in Dylan’s early life as well as well as woody’s. The never ending tour and the railways went hand in hand so had to be a feature in any Bob Dylan portrait drawing and also having a great significance towards it being a journey.

Success is a journey of many events.

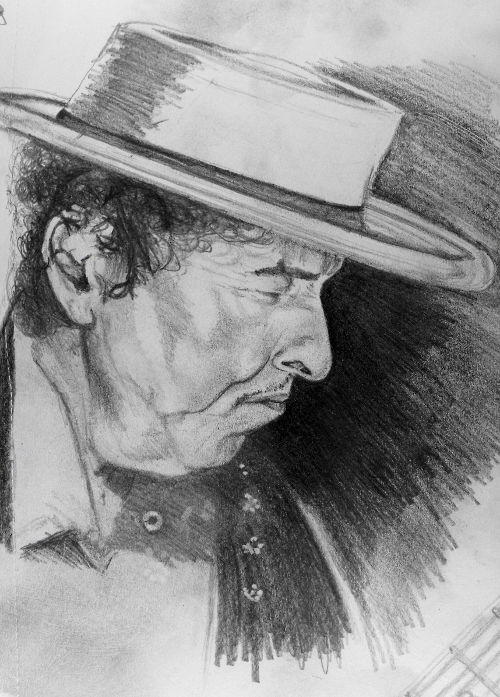
The graphite pencil portrait drawing of Bob Dylan below was my first attempt at drawing him. I used graphite pencils, mostly a 2b and 4b. This was only a quick drawing but I do think I captured something of the man as he is nowadays in this drawing. Much older than the young man moving to New York in 1961.

Bob Dylan Drawing Graphite Pencil Portrait.

The more you draw a persons face, the more you learn about it, so it is important to do this when trying to create something original from photographic information. Doing this also helps to find ideas for new concepts and ways of stating something in your drawing, as often they suggest ideas.

All of this together is more than good reason to do some preliminary drawing and also having a wish of creating something original it is necessary for feeding your imagination I think.

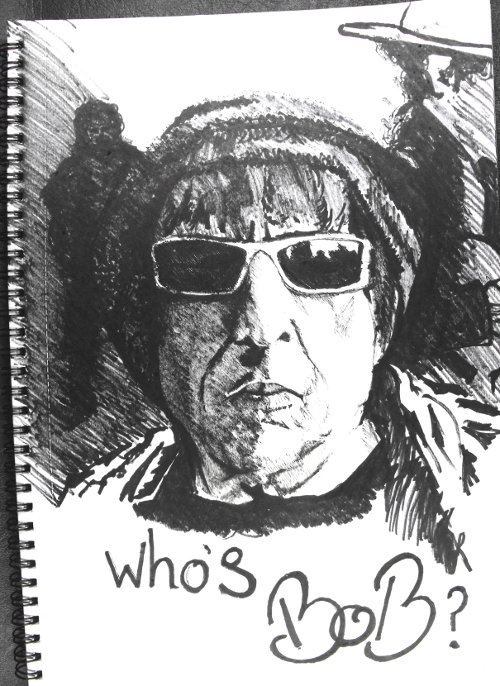
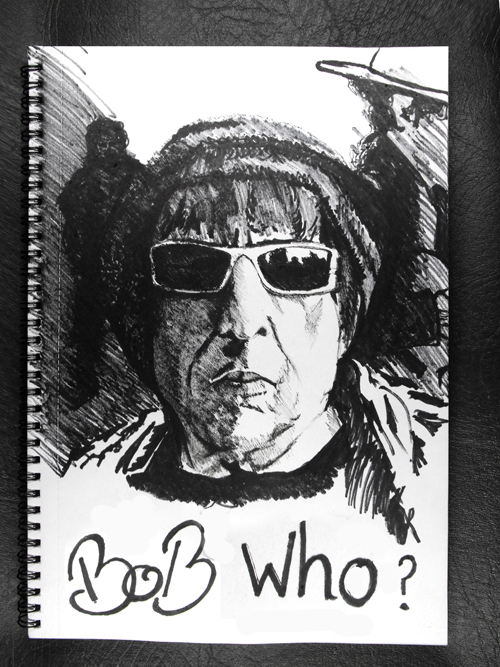
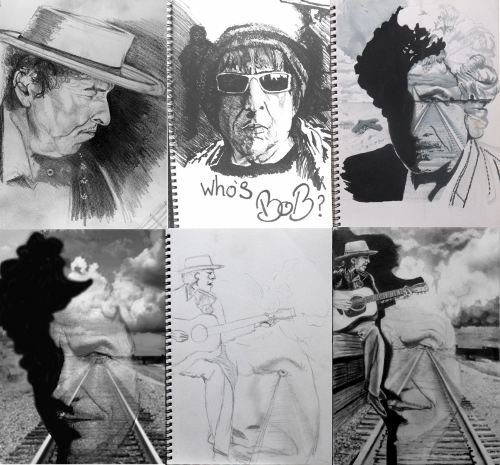
I found an image on line of Bob not looking like Bob at all, wearing a woolly hat and a jogging suit out for a jog. It was not your usual image so I had to have a go at drawing it just because of this reason and I was looking for something original. The drawing you will find below is another quick drawing with a black Sharpie marker pen.

Bob Dylan drawing with marker pens.

Notice how I have put the suggestion of other images into the drawing as well, trying out ideas and trying to generate something new from the other drawing by looking for a way of combining them.

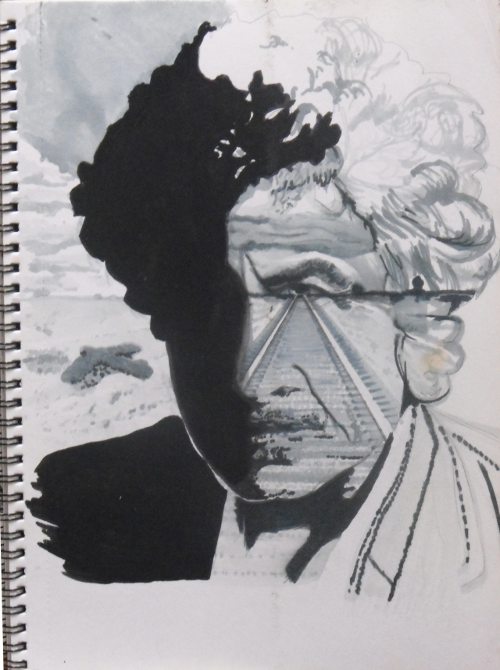
The image below was mostly drawn with maker pens, using different grey scale tones, I did the out line sketch with graphite pencil. I tried combining another image of a railway line into the drawing because I was trying ways of portraying something different to make the drawing original. The railway line idea became a good idea when I thought about it after because it would be a significant part of the never ending tour.

Portrait drawing of Bob Dylan with marker pens, the never ending tour idea.

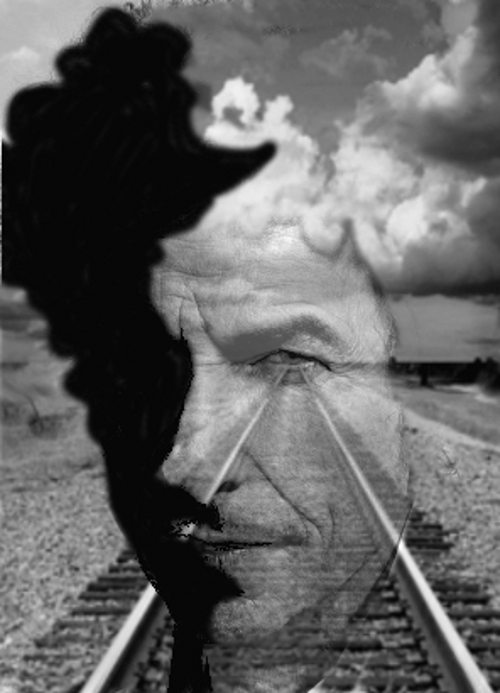
Now I had something to work with I created a photographic type image by combining different images together using a free photo editing software called GIMP Shop, this is the image below.

Bob Dylan Never Ending Tour Photographic Image

When I am working on idea I like to put them together in one place so I can see them all together and then keep looking at them looking for further ideas.

From looking at all these ideas together I came up with the idea that I could use the blacked out side of the face to bring something else into the image and after looking at it for a while I thought that I could make an image of somebody sitting down on a stool playing the guitar. This then instigated me doing a quick sketch of what it might look like and can be seen in the drawing below.
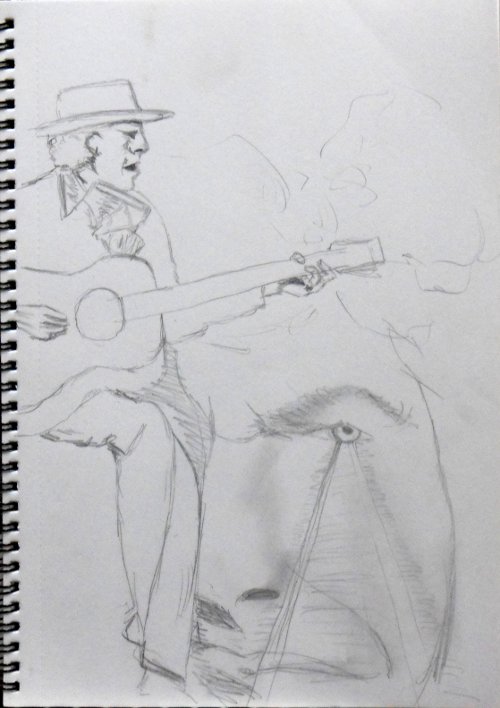
Quick sketch for Bob Dylan pencil portrait drawing.I now had the idea I was looking for, a story of the never ending tour, a younger Bob Dylan and older version, with a railway line between both so I then made the portrait drawing you can see below by taking bits from different photographs, combining them into something completely new.
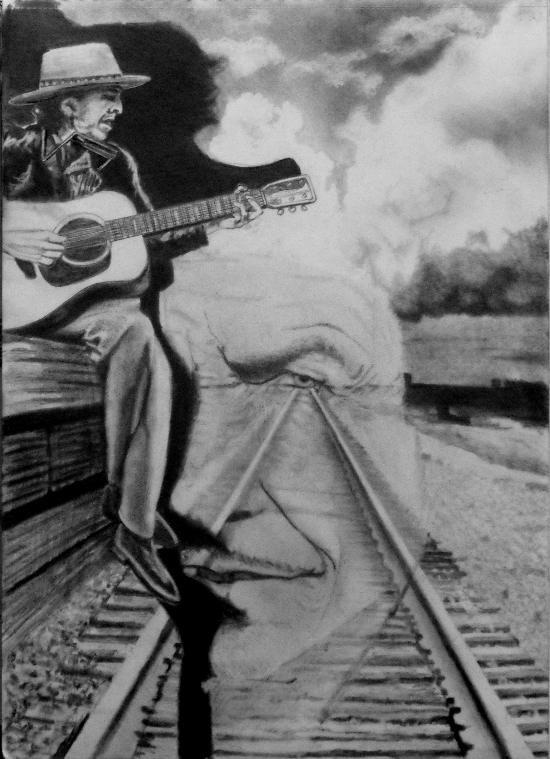
Bob Dylan, never ending tour graphote drawing of the portrait idea.
A graphite pencil portrait drawing of Bob Dylan, the never ending tour, size A3, 16″ x 11-6/5″.

Bob Dylan portrait drawing, The never ending tour, 2011.
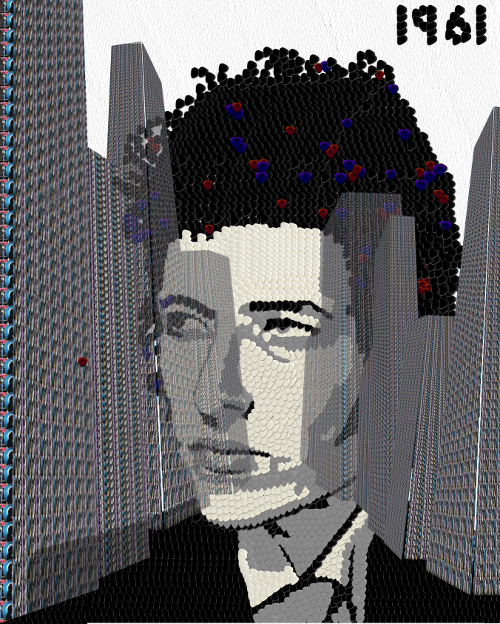
New York City Musical Landscape in 1961.
This image is another idea made from thousands of guitar picks manipulated in GIMP photo editing software. It is a portrait of the New York City Musical Landscape in 1961 in which the young Bob made one of his first stops on the Never Ending Tour.

The video below was another experiment captured with a camera and illustrated with black Indian ink, a brush and some water.

View Gareth Pritchard’s profile on G+

Easy pictures to draw everywhere honest.

You are not going to believe this but all pictures are easy pictures to draw, ha, ha. 🙂 🙂

The truth is drawing is easy when somebody tells you how easy, there are many easy pictures to draw but most people don’t realize, don’t know, don’t want to know or don’t want you to know and that’s the truth. The visual culture, visual media, commercial arts, arts industry, all make pictures the easy way and the only people who don’t are us, ordinary people like you and me.  Except I realized this by accident really because I spent 40 years learning the hard way first, the most difficult way possible really by teaching my self.

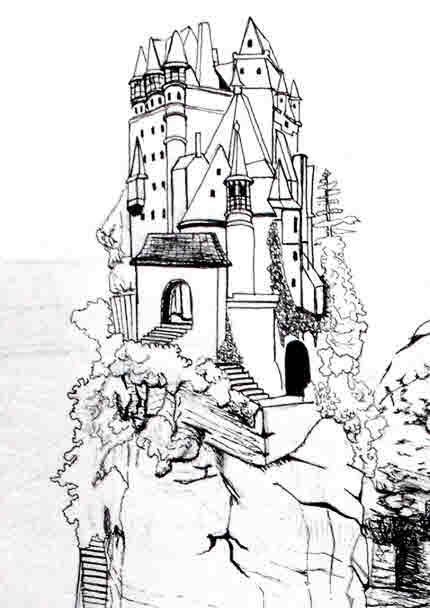
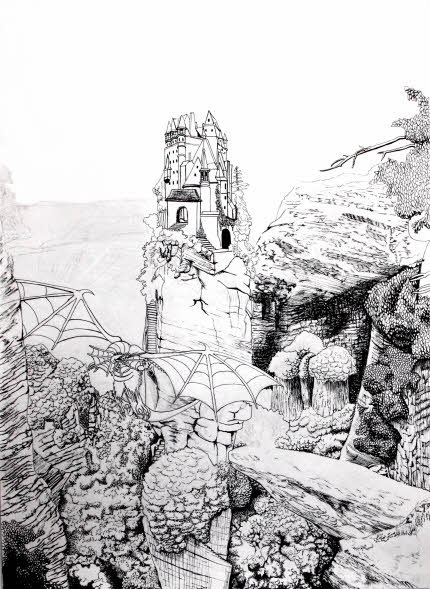
Easy pictures to draw lonely cliff castle.
Easy pictures to draw, lonely cliff castle drawn by human not machine.

Easy pictures to draw is how the industry do it.

Take a good look at the drawing, commercial arts industry, colleges, universities and you will find far less little actual drawing going on than you realise, much of it is now done on computer, by machine, yet we all try to do it the hard way by trying to draw free hand. Yes there is great self satisfaction and accomplishment in doing drawings free hand but when you are trying to draw like your favourite artist or draw your favourite picture, you will find that it usually comes from the art media industry, who don’t do it that way really when they use machines to do it and it’s quite different.

They use computers for everything nowadays, so it is questionable if it is actually drawing at all, aren’t they very easy pictures to draw when a machine does it for you?

Yes it takes some understanding and skill to use those machines but the question is are they doing the drawing or are they operating a machine that’s doing the drawing?

Of course nobody tells you this, nobody tells you when you are drawing or learning to draw that you are competing against machines and I am not sure if they or any body at all even realizes it but drawing with a machines is questionable because who’s actually doing the drawing?

Those that use these machines don’t tell you either but like I have already said I am not sure they have realized, I would love to tell you that it’s some dirty secret but I am not sure it is, they just let you form your own opinion which is what we mostly all do anyway.

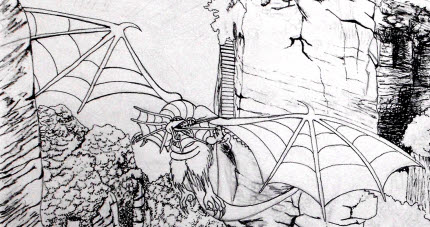
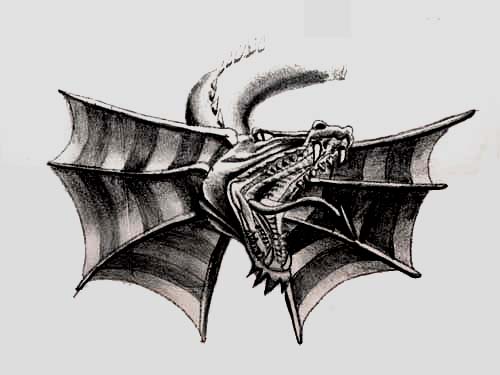
Easy picture to draw the dragons flight.
The dragons flight showing easy pictures to draw without using a machine to do it.

Let me get back to the subject after my little rant, easy pictures to draw are very easy so easy even you can do them and compete against these machines, not only compete but use them so you are doing the drawing, real drawings that you can tear in half if you want to and throw away. Try doing that with a computer drawing, have you tried ripping a computer in half, don’t bother it’s a waste of time and somebody else might have the drawing on their computer so you won’t even be able to destroy it.  Just a silly joke don’t take me too serious on it please!!!

How much does a pencil cost, $2 perhaps for an expensive one, how much does a computer cost $500 for a reasonably cheap one, how much does the software cost, any thing from $50 to a $1000 plus depending on what it is. You already have access to a computer or you wouldn’t be reading this so no worries there, all you need now is a pencil and some paper.

I am sorry but I still haven’t told you how to draw easy pictures but I will if you join me and down load my free report (How To Draw Easy And Simple), please find a subscription box at the top of the page, soon it will be you finding easy pictures to draw.


Dragon Land showing easy pictures to draw in pen and ink.
Easy pictures to draw, Dragon Land, drawing in pen and ink, showing that we are not machines, we are human beings.

If you want some drawing ideas then take a look at the page at the end of this link to drawing ideas.

Easy pictures to draw will soon be everywhere you look if you read my report, I promise and I will also not be filling your email in box with spam every five minuets trying to sell you something either, once or maybe twice a month if your lucky will be sufficient but not trying to sell you stuff.

View Gareth Pritchard’s profile on G+


Easy drawings to draw, so easy even you can do it.

Hello there, I am not going to give you any easy drawings to draw as such because I do not really know what you like or would want to draw. The best part of this is you chose your own drawings and I am going to make it very easy for you. I am going to make it so easy anybody can do it, if they can hold a pencil. I am going to do this by telling you a way how you can draw anything you want, quite simply by drawing it off your computer screen, it’s that easy.

Easy drawings to draw are so easy they are simple.

Yes, easy drawings to draw are so easy, you just find the pictures that you like, that you can get from anywhere on line or from photographs that you or other people have taken, they could be anything. You can get your favourite Anime or Manga pictures they could be pictures of animals or people the choice is yours and all you really need to do is trace them from your computer screen, it’s that easy.

The method.

If you place a piece of plane printing paper on your computer screen over a picture that you like you will be able to see it through the paper because of the light coming from your computer monitor. This means that you can trace any picture you want if you can get it up on your computer monitor screen and it’s so easy. Most commercial arts, drawing studios have tools that are called light boxes or rather they used to have these because now nearly everything is done on a computer, meaning the light boxes are not used so much anymore. These light boxes are a box with a light inside and a piece of glass or clear plastic over the top, where you place the picture you want to draw and a clean piece of thin paper over the top to draw onto. These light boxes are not as good as a computer monitor because the light has to shine through the image and the paper you want to draw onto, whereas with a picture on a computer monitor the picture is its self the actual the light source.

Any picture you like.

Tracing pictures in this way will help you to be able to draw any picture you like quite easily and once you have got the outline of the picture you want to draw then you can finish it off by doing the shading or colouring it in, but don’t attempt to do this on the monitor remove it first. Many people might think that this is cheating but it is just an easy way to learn how to draw easy drawings and if you do this it will help your free hand drawing improve a great deal.

Easy drawings to draw very time.

Now that you know this you should also know that you can now draw any picture you want easy and get it right every time, the simple way, why make things difficult when they don’t have to be?

Just one thing you need to know first before you do this, if you are using a flat soft screen TFT monitor then do not press hard on your pencil as it will damage the screen, if it is glass then it will be fine and will not get damaged. There is no need to press hard on your pencil because you only need a light line to start out with as you can easily go over your drawing when it is on the table, desk or where ever you do your drawing.

We will not accept any responsibility if you damage your monitor as there is no need to press hard on your pencil and by not doing so it will also help you to become better at drawing.

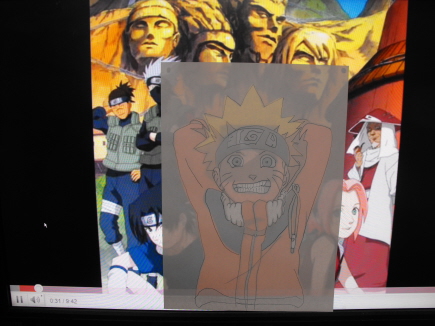
Naroto, easy drawings to draw from a computer monitor.
This is a quick drawing taken from a paused video on YouTube.


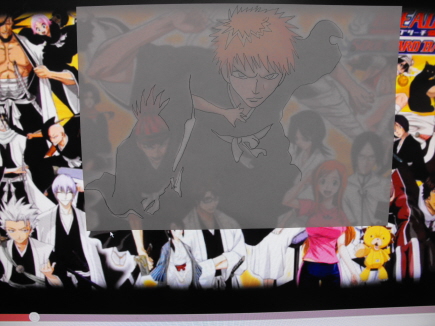
Bleach character from a YouTube video easy to draw.
This is another character, Bleach taken from the same place as the one above in the same way.

Easy drawings to draw are so easy, even you can do it when you know how and now you have been told how.

View Gareth Pritchard’s profile on G+


Sketching, draw easy.

Sketching, draw and drawing are the same thing right, are they really, but of course they are, aren’t they?

To draw and sketch, are they the same?

Dictionary examples:

“To draw is to sketch (someone or something) in lines; delineate; depict: to draw a vase with charcoal, to compose or create (a picture) in lines, to mark or lay out; trace: to draw perpendicular lines.

A sketch is a hasty or UN-detailed drawing or painting often made as a preliminary study.”

Many years ago when I was in school, I took an option to do Technical Drawing, I didn’t like it because it was more about mathematics, accuracy and precession with no room for mistakes, I did not consider it to be drawing at all. I believed it was too mechanical, too calculated and I did not realize then, that all drawing is about these same processes of measurement but carried out in different ways, using your eyes rather than a ruler. When doing Technical Drawing, you know how to do it and how it will look, before it has even been done but when you do some sketching, these restraints are not as important, as just getting something down on paper.

To me there is a big difference between them are: drawings are about accuracy and detail, where as sketches are about speed and experimentation, but to clearly define them individually, is difficult because aspects of both spill into each other.

When you draw with accuracy, the information you record becomes visual knowledge, so when you sketch, that same visual knowledge spills over into your practice, which in turn informs you’re sketching.

Sketching is about getting things right and wrong, to test or find new ideas, to drive your ability, where as drawing is about doing this but also it is about getting it right, with all the details in all the right places.

Drawings can sometimes also go wrong, which often inspires new ideas but with sketches, there is less emphasis on accuracy, so more opportunity for errors of judgment and greatly increasing the chance of finding happy accidents.

Happy accidents, are where people find positive outcomes by accident and many great discoveries in art, science and all other areas are found often, in this way, the one premise for doing this is, you won’t find anything if your not looking.

When people draw they first sketch an outline, then they sketch where the detail goes and then they draw in the detail. This process is one of the basic rules of drawing and sketching, along with working from light to dark.

When people draw, they first make small light marks identifying where everything goes, in relation and proportionate to everything else in the drawing, as compared to the subject of your drawing or sketching.

Drawing focuses on conveying subjects, through the deeper understanding of details contained within them, both require you to think, about what you are doing, at least in the beginning, both require you to constantly look, from subject to work area.

Both teach you to see and to look for more, even when producing less detail, you still learn to see in terms of plains, angles, curves, contour, light and dark, the process of drawing or sketching, will both aid the development of this ability.

The more you do it, the better you get at it, sketching, draw and drawing are the same thing right?

A quick sketching made with marker pens.

View Gareth Pritchard’s profile on G+


How to draw graffiti easy.

How to draw graffiti, the first step you need to take, is deciding, what you are going to write, are you going to write, your name or are you going to give yourself a handle, like many graffiti artists and writers do, all over the world, all of the time. If you want to get a better understanding of, what a handle is, then you can, by following this link to graffiti creator,graffiti art.

Now take a sheet of paper and write your name or handle on it, with a pencil, the way you would normally, write it and have a look, at how you write it. Write it again, only this time make it all capitals letters, with plenty of space between them, now try writing it, in as many different ways, as you can think of and don’t worry, about the end results, it is only the start of a process.

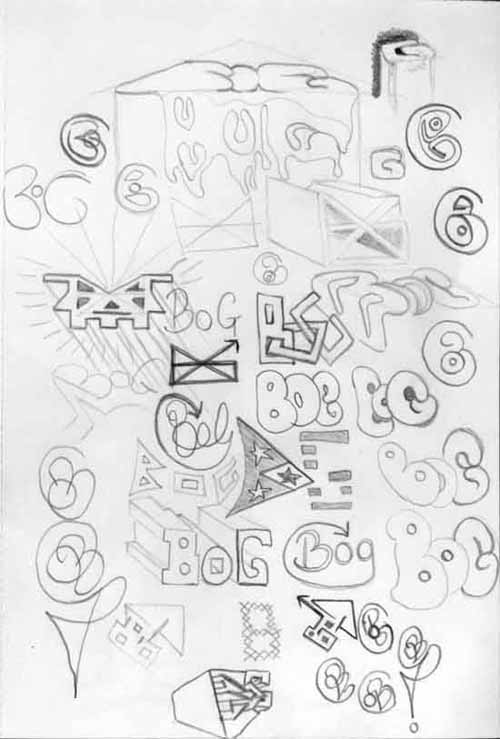
Please see my example ideas, design sheet, below.

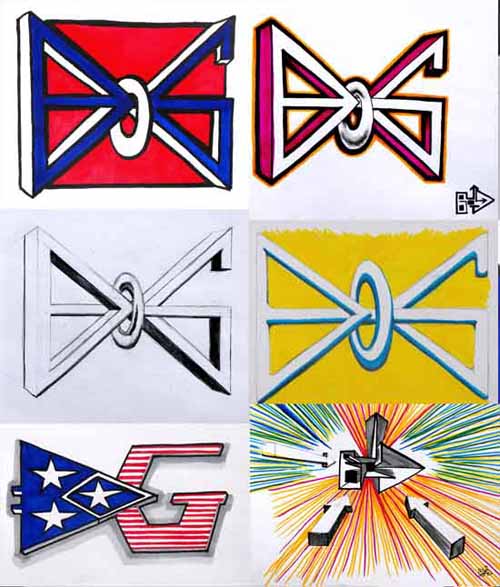
3D graffiti design sheet of ideas drawn with a 3B graphite pencil.
3D graffiti design sheet of ideas drawn with a 3B graphite pencil, cool anybody can do this.

As you can see, I have used different types of letters, curved ones, square linear type letters, boxed, three dimensional letters and some, that are hardly readable as letters at all, the more you create, the better. If you find yourself stuck, after only drawing a few, then look for some ideas, in the news paper, a comic, magazine or anywhere, you might find ideas for lettering.

When you are happy, that you have generated enough ideas, then you can look over them and pick out one or two, that you like, for further development, it can be as many as you like, not just one or two, if you like them. Now, redraw these out on their own, in the center, of a clean piece of paper, try to fill the paper, as much as you can and make these drawings, more accurate, correcting or altering, anything that needs it, as you go. Try to keep your lines faint and not too heavy because they will be harder to cover later.

You can also look online, for lettering and graffiti art because there is an abundance of it, even videos that show some fantastic work, with it all being, a great source of ideas and inspiration.

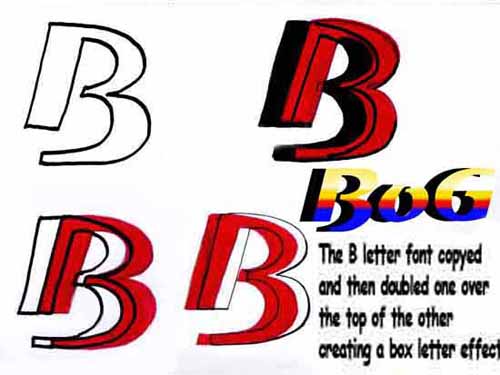
You can create block lettering easy, by just redrawing your letters, over the top of each other, again but out of line, like in the example below.

You could trace your name or handle and then move it a little, to the left or right, up or down and retrace it, over the top, then fill in the area, where you can still see, the first letter outline in black, to create the illusion of shadow.

You can also overlap letters, so the second is hiding, slightly behind the first and the third behind the second, to create the illusion, of one being in front of the other, this overlapping, is a very common feature, in graffiti art.

Please see the example below, to understand this a little bit more, in a visual context.

An example of 3d box lettering using outlines over the top of one and other.

Notice the black shadowing, created by moving the letters, up and the black outline, around all the letter shapes, you can also see that the colors have been added, any old how but are still effective because of the, well defined black outlines.

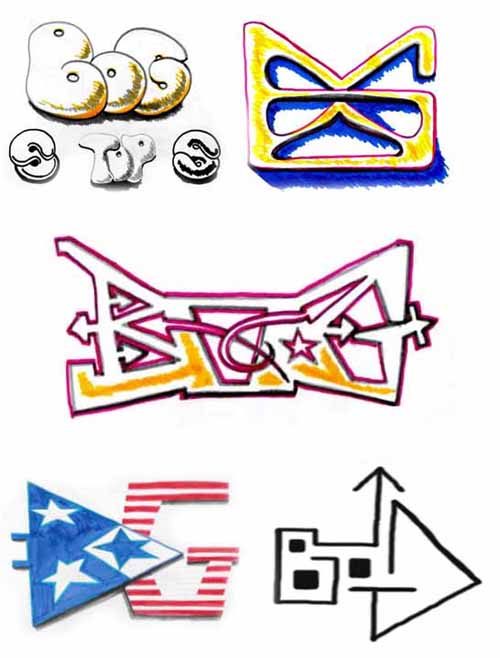
Now you can take some of your original ideas and try some of this, with them, below you will find some of my designs, taken from the first sheet of simple pencil drawings.

3D lettering example of how to use letters doubled over the top of each other to make box letters.

I have added color and black outlines, which is something you should now be trying, with your own designs, you could try many different combinations of color or black outlines, you could even try, colored outlines.

Now you can, further develop one idea and try it, as many different ways, as you can think of or combinations or color, see the examples below, for further development of ideas.

Images of earlier examples that have been further developed.
Some of the earlier examples that have been further developed.
Images of further development graffiti letter ideas.
Examples of further development with graffiti letter ideas.

The tools I use:

Paper or drawing pad, A4 printer paper is good and not very expensive but pads are better, you can carry them around with you, if they are not too big.

Soft graphite pencils, preferably mechanical, pop a point type pencils, 0.5, 3B, if you can get them.

Fine line permanent ink pens, 0.5 and Biro’s, in different colors.

Permanent marker pens, the more colors, the better.

Water soluble felt tip pens, the more colors, the better.

Colored pencils in various colors.

Quarter inch, flat brush and water.

Learning how to draw graffiti, is not difficult or hard and you can get, very good, very quickly, if you put a little effort in to it, honest.

What are drawing techniques?

Drawing techniques, are the manor in which procedures and methods are applied, for accomplishing a desired result, everything we do, when making a drawing, is usually created by using, different drawing techniques. The different marks we make, when drawing pictures, is also part of our technique and the different combination’s, of marks we use, so already you can see that technique, is actually not one but different combination’s, of contributing factors.

There are many different techniques, for using, the many different tools, available to us, as artists, with some being conventional and others, being less conventional.

The manor in which we, use the tools available to us, eventually gives our drawings a look and feel that is unique, to us as artists because of the combined but differing techniques, we use to execute these drawing skills.

For example, there are many different ways, to hold a pencil and the way in which you hold, a pencil, has a direct influence upon your technique, when using it. I see many tutorials, that are aimed at teaching people how to draw, that insist on telling the learner, how to hold a pencil when practicing, these different techniques, giving them the idea, that the pencil, has to be held in this way or that.

The problem with doing this is, if everyone, did everything in exactly the same way, then it is very likely, they will all produce drawings, that would not necessarily be exactly the same but very similar and without variety.

The best way to hold a pencil, is the way that feels best to you.

Are drawing techniques important?

It seems, that those who experiment with using these tools, in different or less conventional ways, end up producing work that is fresh and unique, giving it an edge on other, similar work.

This is not to say, that using tools in the conventional way, does not produce good work or that everyone, has to use these tools in less conventional ways, to be different but that the best way, to do anything, is the way you feel most comfortable doing it.

By all means, experiment with every drawing technique, you can possibly think of or learn, so as to at least have, the ability at your finger tips because of the importance, of the next point.

The point is this; if you practice your drawing skills often, then you will also develop your own drawing techniques and styles, that will eventually make, your overall style unique to you.

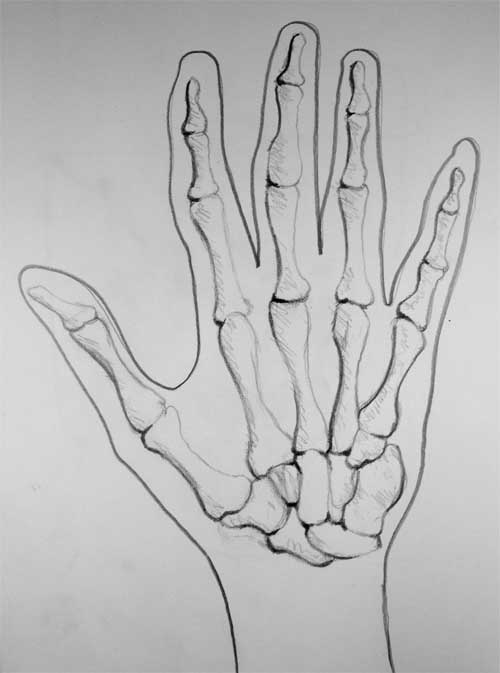
Picture of a hand of hand showing bone structure in some detail.
Picture of a hand showing bone structure in some detail, Phalanges, Metacarpals and Carpals, that make up the different bones in the hand, and the wrist.

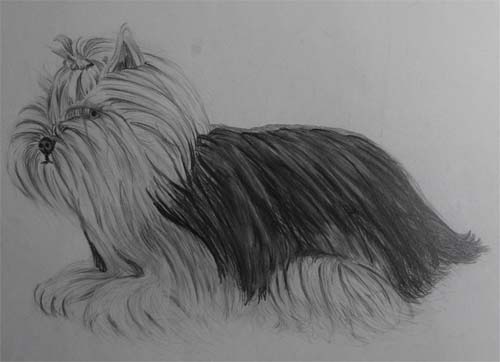
Yorkshire Terrier Hatching Drawing

More drawing people rules.

The manikin is a great tool for drawing people or figures, it is a wooden doll, that can be set up to give you the basic out line, for a figure posing in any position and a great place to start any figure drawing, especially if you don’t have a real figure to draw from.

Images of a wooden manikin figures with one showing how a head can be used to judge proportion.
Image of a wooden manikins, used for figure drawing, when you don’t have access to a figure to draw from, showing how a head can be used, to judge proportion and measure size.

There are variations on how many heads tall an average man is, Leonardo de Vinci’s (Vitruvian Man) is almost eight heads tall where as I have seen statements saying that it is seven and half heads. The truth is this, if you measure the head of the person you are drawing, then measure how many heads it takes, to make up the distance or height of the body, it will be closest because most people vary in size anyway.

Doing this is how drawings are constructed, it is how they are measured for accuracy, mapping and recording from the information you gather, then regurgitating it into the next mark you make, to impress an idea in the viewers mind, even if the only viewer is you.

Drawing people as in the faces of people or portraits, are a very different story completely or at least they could be because I don’t use heads for measuring, when doing faces, I sort of use eyes.

The first thing you need to decide, is where you want the head to go on the drawing surface, so where does the top of the head go and where should the bottom go, in relation to the top?

You need to look at the face your doing from side to side, up and down, horizontally and vertically, whilst leaving some kind of marks behind on the drawing surface, to remind you next time around of where these elements go, in relation to each other. I look for markers, as to where the most prominent features go, on the horizontal and vertical plains, now I look where the eyes go and they are usually, half way down the head.

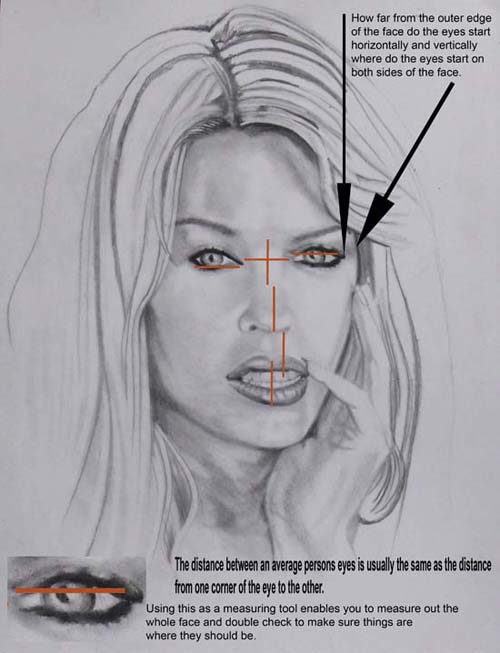
How far from the outer edge of the face, do the eyes start, horizontally and vertically where do the eyes start, on both sides of the face. The distance between an average persons eyes, is usually the same as the distance, from one corner of the eye to the other.

Now you can use this, to re check the other marks, from the outside of the face outline to where the eyes begin, you can use the eyes to also measure, the distance to the end of the nose, from the center point right between the eyes. This distance is usually one and a half times the distance of one eye, from corner to corner.

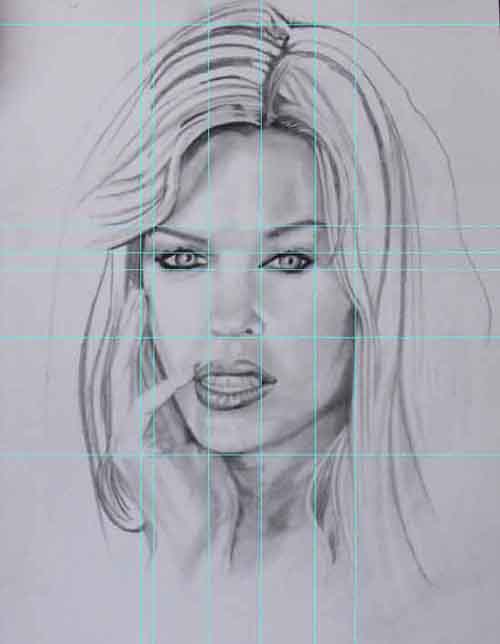
Image of a girls face showing how an eye can be used for drawing a face.
Image of a girls face, showing how an eye can be used for drawing a face, to help you to be more able to judge size, distance and proportions.

The distance of one eye, usually takes you to the bottom of the bottom lip with the mouth closed and the distance of two, and a half eyes, takes you to the chin, from beneath the bottom of the nose, so the eyes can help you see in more ways than one.

By measuring and checking in this way, you learn to look, and see like artists do or people who make drawings of people do, the most important part of drawing people, is the action of doing the drawing, if you don’t practice, you don’t learn enough.

You can use the rule of thumb, when doing drawings from life by holding your arm out, at full stretch and measuring how many thumbs, equate to the size of the head, and check for accuracy in the same way as above, up and down side to side.

There are many other ways to construct drawings of figures, people or portraits, there is the grid method, where you use a grid over the top of your drawing,  that corresponds with a viewing grid that you look through.

If you are copying from a picture, you can use the outer edge of the picture, to use as a measure for reference points, these can then be used for transferring it onto the drawing surface, you can do this by drawing, the outline edge of the picture, onto your drawing area and draw construction lines, see the image below, for a better idea of what I mean.

Image of a girls face showing grid lines to measure the proportions of the face.
Image of a girls face, showing grid lines, that can be used to measure the proportions of the face.

All this is a great way to learn about construction and sets the foundation for creating, great works of art, like the old masters did, and artists still do, because they use these, very same ways as building blocks, to then take the process further.

Michelangelo, Leonardo da Vinci and everybody else uses, there past work as a reference for creating further work, based on this body of work, that they create as they are also learning.

These guys where the ones getting paid for their work because they where revered, as having exceptional skills, that ordinary people didn’t have. When kings wanted something that was impressive, mythical, mystical or magic, to impress the popular culture of the time and still do to the present day, they used artists. The works of Michelangelo, Leonardo da Vinci are impressive because they have been used to teach this knowledge for drawing people, to others for hundreds of years.

To find cool drawings.

Cool drawings are not as easy to find, as you might think because your version of cool, is almost certainly not my version of what is cool, anymore than the next person because it is a matter of taste and you might find that, some of the people can be pleased, some of the time but not all of them, all of the time, labels such as cool are subjective, so they are as individual as the individuals themselves.

I have already established, that it is highly unlikely that, what I find cool, you will also but I can still help you find cool pictures, by giving you some ideas about the ways that I use.

If I know what I am looking for I do searches on Google Images, this is the quickest way I know for finding a picture or drawing, I am looking for because in case you did not know, you can search using key words, the same way you do when you are searching for anything else online, there is one down side to this and that is, although it is much easier nowadays, than it would have been ten years ago, it is still time consuming and laborious. Sometimes you have to literally look through hundreds and hundreds of them, because there are so many.

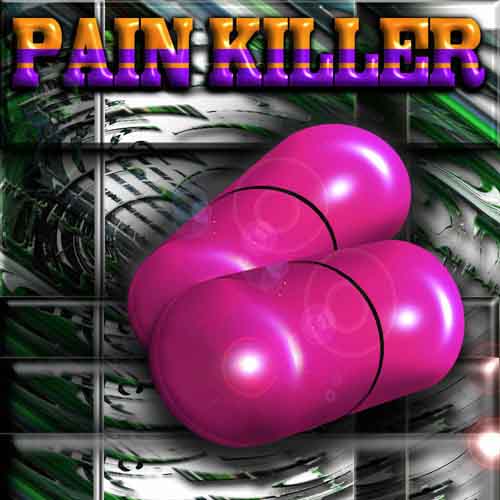
The pretty pink pain killer image.

You can also do searches on other sites, like Flickr or Flixya but there are too many photo management sites to mention them all, these sites store millions of indexed images, belonging to other people, pictures they have submitted. Some of these types of sites, actually pay you a small fee if others, want to use the ones that you have submitted. They all have rules about this but these are usually quite liberal and open minded, yet still quite tasteful or respectable because they have to try to please all.

One of the best ways to find cool drawings or pictures, that I especially like because of the way it works is a free online tool, called Stumble Upon.

It works like this, you join Stumble Upon by submitting your details, to become a member, then you select topics of interest, the more you pick the more variety you will see but these will not all be pictures, unless you clicked on the tool bar to select just images. The great part about it is this, you click a button to be presented with random pages of interest, if you set it to images then you will just Stumble Upon random pictures, covering any topic.

Now because the best usually climb to the top, through popularity in this program, then you get presented with the most popular, so they are usually very good but also besides this, they are random, so you do not have control and are presented with images, that also surprise you, giving you some great random subjects, that often stimulate your own ideas, for creations to work on.

I find Stumble Upon a great tool for giving me new ideas, when I don’t have any but also very entertaining, with it’s rich variety of cool drawings and pictures, also a great place to put your own work on too.

How to draw easy, creating depth.

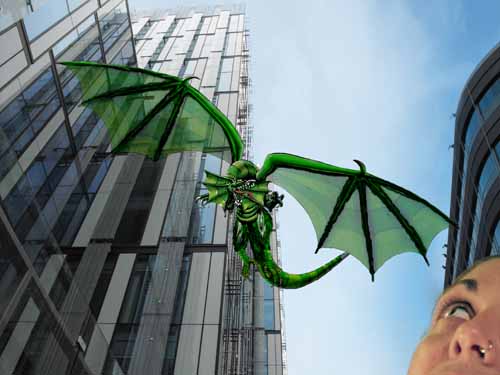
In the image below, is an example of how creating depth in a picture can be done, even when looking up into the sky, the buildings create an illusion of depth through their linear structure of lines, converging to a point in the sky, drawing the eye up into the sky, like the perspective construction lines in a drawing, taking your eyes, leading them off into an imaginary distance. This combined with a close fore ground subject, helps the illusion become more believable, in this image there are really only four subjects creating the illusion, the face and building above it, the dragon and the building behind it, all creating a depth of field in the onlookers eye, which tends to be lead from the top middle to the bottom right hand corner and vice versa.

Dragon in the sky.In the image below, although the eye is lead up into the sky by the lamp post and the cranes to observe the big cloud filling most of the picture, the eye is the lead off as other clouds diminishing in size, lead off into the distance, creating the illusion of depth once again in this image, these are two examples of how perspectives, can be created even when looking into something as seemingly empty of structure, like the sky. It is interesting how other structures in the image can help to create the illusion of depth and even something as simple as clouds, can all help when they are reduced in size.

Distance and depth are created by using lines to lead the eye, the reduction of objects in size and making the objects seem further away, less well defined in detail, giving a further impression of distance in your pictures. Although these are not drawings as such, I used them because they give us some very good natural examples, of how distance and depth are created in the world around us, and how this can be utilized to create these illusions in our own drawings, if we think about them, for incorporating them into the drawings we do.


Distance in the sky.(”Miki Falls”) manga creator Mark Crilley shows us in one of his how to draw videos, Manga backgrounds, an interesting demonstration on, how you can be creating depth in your pictures and how it is achieved by placing an emphasis, on using color and line work to create the illusion of depth, controlling the definition of objects within your picture, making fore ground objects more defined than background objects.

Take a look it will be worth it.

How to practice using a pencil, without boring yourself to death.

Most people don’t know how to draw, they don’t really know what they are looking for, let alone be able to draw it and why should they?

Why would you know anything about practice using a pencil if you had not been using one regularly?

Most people think that they have to draw an outline but can’t actually see one because they don’t know what they are doing.

Most people get better and learn quicker if they trace pictures but most people also think tracing pictures is cheating and so never use tracing as a learning method, what a shame. When you trace a picture you can only realistically trace out lines, you are not able to do the shading as well when tracing and so drawings that are traced are unfinished looking, very uninteresting because they are uniform, without tonal variation or quality of line.

When tracing pictures, you get your outline very accurate, so the rest of the drawing is more likely to be more accurate and it enables you to see the outline, more easily so it will look good and you will feel good about it.

Constructional drawing is the foundation of all drawing, get it right and you will have saved yourself half of the struggle but doing the other half of a drawing, the shading is a much more enjoyable and a great way of learn about construction drawing, so you learn the difficult stuff by doing the easy stuff first.

Design sheet of ideas for potential further development.

The easy way or the hard way, it’s completely up to you?

If you want further information about why and how tracing works scientifically, then take a look at this interesting article (How to draw easy an extraordinary tail of two brains) or do some research about the functions of the left and right brain. You will learn about the benefits of drawing and how the dominant left brain activities, actually make it difficult to learn drawing but also stunting your thinking power, along with your creative abilities.

Don’t make it hard, make it easy.

Enjoy learning to use a pencil at the same time as learning about how to do construction drawing the easy way first, not the difficult way round, like everybody else teaches, easy way first is the way to go but it astounds me, why the hard way is always practiced. There is a great book by Betty Edwards called drawing on the left hand side of the brain, that many people have used to help them learn to draw and draw well, so well, that many have been astounded by their own abilities, after using the methods given in the book, one of the main methods is tracing because it reaches the parts, other methods cannot reach.


Dragons head drawn with graphite pencil 3b & 5b
Dragons head drawn with graphite pencil 3b & 5b as an idea for another picture.

They don’t teach geometry in primary school because the children wouldn’t understand it but they give them pencils to play with, the geometry comes much later when they know what a pencil is, they also teach tracing which has got to be one of the easiest ways to practice using a pencil by drawing because when you trace pictures, you can draw any outline for any picture you want easy.