Tag Archives: Drawing

Drawing with prehistoric drawing tools.

32,000 years ago our primitive human ancestors, used charcoal as a black pigment for decorating their caves, with drawings and images. Along with the cavemen, the Egyptians also painted their highly decorative hieroglyphic writings, with this very same substance that is still being used to day for the same purposes of drawing, writing and decorating.

Thankfully we don’t still live in caves but we do still use charcoal for drawing and the pigmentation of black paints, such as Carbon Blacks, Ivory Black, Vine Black and Lamp Black.

Carbon black is the name used for different but common black pigments, that are made by charring organic material, usually wood or bone, it only seems to be black because there is almost no light being reflected from it, that is visible to our eyes. Carbon black substances reflect very little or no light at all, so because of this, they give the impression of being black.

These black carbons where produced originally, by charring different types of organic material, Ivory black was originally made, by charring ivory or animal bones, where as Vine black was made in much the same way, by using the dried out, chard stems of grape vines instead. Nowadays you can still obtain vine charcoal but this has been mostly replaced with willow and other similar woods, making it more substantial for use in drawing. There are many different other types of charcoal produced, for different purposes, just one example would be charcoal grills, for grilling your steak and other meats outdoors.

Lamp black as it was called, was originally produced from the soot that gathered inside oil lamps, that was also called lampblack because of where it came from.

These end pigments are all carbon substances, which give them the generic term of being called carbon blacks.

As it stands today, charcoal is a prehistoric drawing substance, that is still effectively being used by many artists in the production of fine works of art, all over the world.

32,000 years on into the future, with the production of fine art still being practiced by many using charcoal in the drawing process and almost all black pigment, being obtained from chard materials, thus making charcoal the granddaddy of all the drawing substances, known to man, it must be good because we still use it.
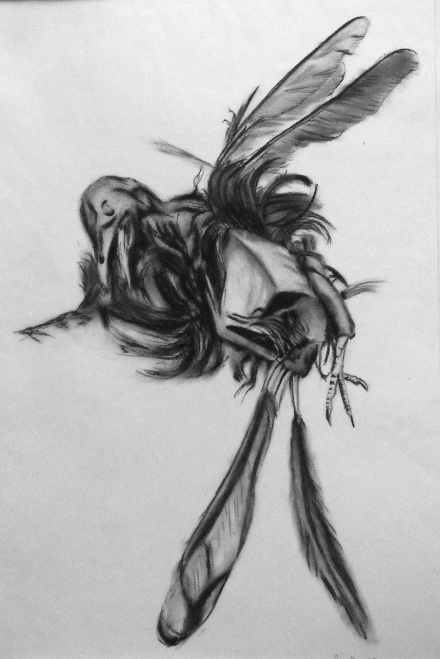
 

Dead Bird Drawn With Compressed Charcoal
Road Kill , a dead bird, a compressed charcoal drawing.

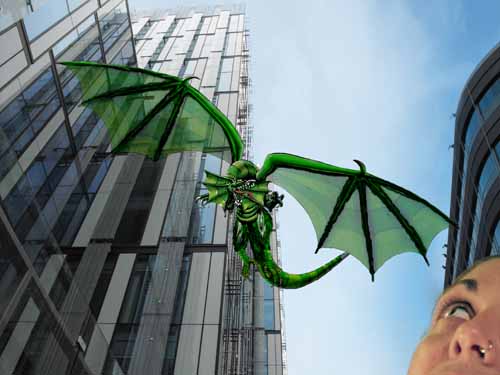
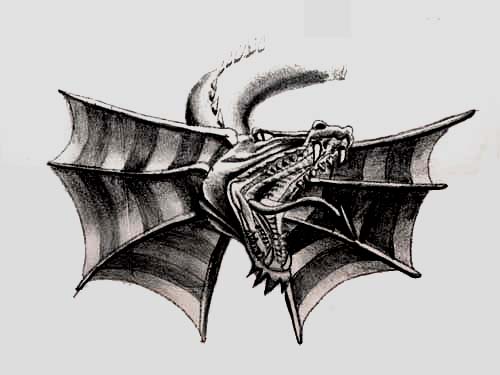
Aerial maneuvers, dragon over the roof tops.

Easy drawing an illusion of depth.

As can be seen in the previous post, (“Miki Falls”) manga creator Mark Crilley in his video (How to draw Manga backgrounds) shows, how it can be easy drawing the illusion of depth, by defining the fore ground objects with greater detail and color, than the background objects.

This technique is widely used by most artists to convey the impression of distance but is most often combined, with objects drawn in perspective, which is also covered in earlier posts. This is most often conveyed by putting objects into pictures, as triggers to convey this illusion and help lead the viewers eye, off into the distance along a line of ever decreasing reference points. Photographers use these very same techniques when taking landscape photographs by again placing larger or close up objects in the foreground to create the illusion of depth.

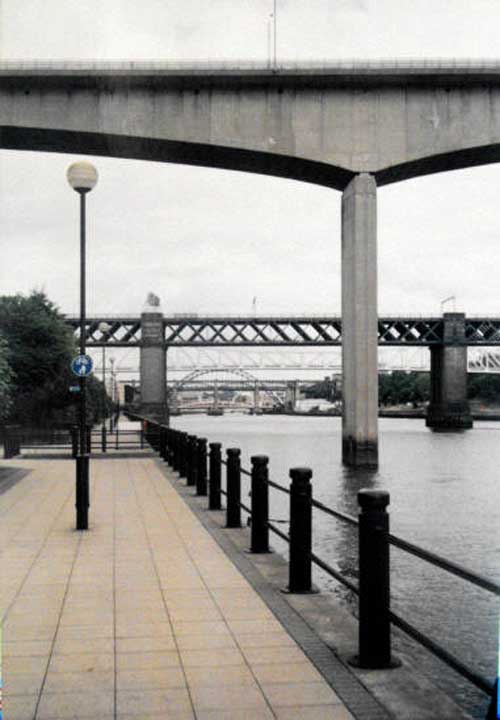
Below is a classic example of this, the photo image shows many parallel lines going off into the distance, with lines between the paving slabs on the ground, the lampposts decreasing in size as they go further into the distance. Then there is the railing along the edge of the water and also the bridges, with first one filling more than half of the picture, with the second only filling about one sixth and the third, being only about one tenth. All this information draws the eye along the lines towards the point, where they converge creating the illusion of distance because remember that this is really, only a flat 2 dimensional image.

Image of bridges in Newcastle, England, UK.
Image of bridges in Newcastle, England, UK, shown as an example of elements that create distance.

Also you should notice how the objects and bridges in the distance are only vague, as they are far less defined than the foreground railing posts, paving slabs and lampposts.

Photographs are a good example of how, these same easy drawing techniques, when applied to constructing backgrounds, create a sense of distance, this can be used to trick the eye into seeing the illusion of depth, without it really being there.

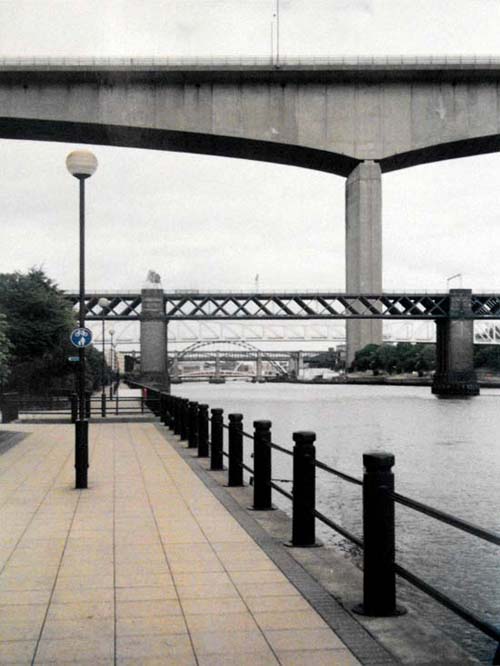
The image below shows how pictures can be changed by moving the order of objects, you will see what I mean by looking at the picture.

Image of bridges in Newcastle Upon Tyne, England, UK that has been edited.
Image of bridges in Newcastle Upon Tyne, England, UK that has been edited to show how moving things around can change their perceived distance and size. Do you think that the concrete bridge that was in the fore ground now actually looks bigger because the upright pillar has been pushed back in the distance?

How to draw easy, creating depth.

In the image below, is an example of how creating depth in a picture can be done, even when looking up into the sky, the buildings create an illusion of depth through their linear structure of lines, converging to a point in the sky, drawing the eye up into the sky, like the perspective construction lines in a drawing, taking your eyes, leading them off into an imaginary distance. This combined with a close fore ground subject, helps the illusion become more believable, in this image there are really only four subjects creating the illusion, the face and building above it, the dragon and the building behind it, all creating a depth of field in the onlookers eye, which tends to be lead from the top middle to the bottom right hand corner and vice versa.

Dragon in the sky.In the image below, although the eye is lead up into the sky by the lamp post and the cranes to observe the big cloud filling most of the picture, the eye is the lead off as other clouds diminishing in size, lead off into the distance, creating the illusion of depth once again in this image, these are two examples of how perspectives, can be created even when looking into something as seemingly empty of structure, like the sky. It is interesting how other structures in the image can help to create the illusion of depth and even something as simple as clouds, can all help when they are reduced in size.

Distance and depth are created by using lines to lead the eye, the reduction of objects in size and making the objects seem further away, less well defined in detail, giving a further impression of distance in your pictures. Although these are not drawings as such, I used them because they give us some very good natural examples, of how distance and depth are created in the world around us, and how this can be utilized to create these illusions in our own drawings, if we think about them, for incorporating them into the drawings we do.


Distance in the sky.(”Miki Falls”) manga creator Mark Crilley shows us in one of his how to draw videos, Manga backgrounds, an interesting demonstration on, how you can be creating depth in your pictures and how it is achieved by placing an emphasis, on using color and line work to create the illusion of depth, controlling the definition of objects within your picture, making fore ground objects more defined than background objects.

Take a look it will be worth it.

How to practice using a pencil, without boring yourself to death.

Most people don’t know how to draw, they don’t really know what they are looking for, let alone be able to draw it and why should they?

Why would you know anything about practice using a pencil if you had not been using one regularly?

Most people think that they have to draw an outline but can’t actually see one because they don’t know what they are doing.

Most people get better and learn quicker if they trace pictures but most people also think tracing pictures is cheating and so never use tracing as a learning method, what a shame. When you trace a picture you can only realistically trace out lines, you are not able to do the shading as well when tracing and so drawings that are traced are unfinished looking, very uninteresting because they are uniform, without tonal variation or quality of line.

When tracing pictures, you get your outline very accurate, so the rest of the drawing is more likely to be more accurate and it enables you to see the outline, more easily so it will look good and you will feel good about it.

Constructional drawing is the foundation of all drawing, get it right and you will have saved yourself half of the struggle but doing the other half of a drawing, the shading is a much more enjoyable and a great way of learn about construction drawing, so you learn the difficult stuff by doing the easy stuff first.

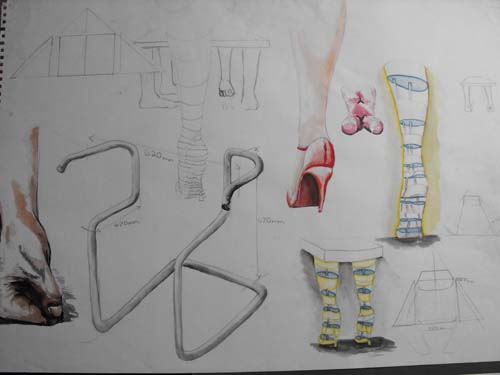
Design sheet of ideas for potential further development.

The easy way or the hard way, it’s completely up to you?

If you want further information about why and how tracing works scientifically, then take a look at this interesting article (How to draw easy an extraordinary tail of two brains) or do some research about the functions of the left and right brain. You will learn about the benefits of drawing and how the dominant left brain activities, actually make it difficult to learn drawing but also stunting your thinking power, along with your creative abilities.

Don’t make it hard, make it easy.

Enjoy learning to use a pencil at the same time as learning about how to do construction drawing the easy way first, not the difficult way round, like everybody else teaches, easy way first is the way to go but it astounds me, why the hard way is always practiced. There is a great book by Betty Edwards called drawing on the left hand side of the brain, that many people have used to help them learn to draw and draw well, so well, that many have been astounded by their own abilities, after using the methods given in the book, one of the main methods is tracing because it reaches the parts, other methods cannot reach.


Dragons head drawn with graphite pencil 3b & 5b
Dragons head drawn with graphite pencil 3b & 5b as an idea for another picture.

They don’t teach geometry in primary school because the children wouldn’t understand it but they give them pencils to play with, the geometry comes much later when they know what a pencil is, they also teach tracing which has got to be one of the easiest ways to practice using a pencil by drawing because when you trace pictures, you can draw any outline for any picture you want easy.


How to draw easy, step by step videos, to help you.

Please find below some videos, that will inform you on how to draw easy step by step, using simple methods as always, except this might be just a little more time consuming but actually produces more accurate results.

It is easy to draw, if you follow the information in these first two videos which show you step by step how but most people will shrug them off,  saying that’s not drawing. What they don’t really understand is that, most of the stuff they want to draw and most of the so called experts doing drawing out there, in the big wide world, aren’t doing it the hard way like you think they are but are actually doing it the easy way.

The reason why they do it the easy way is because it is faster and anybody will tell you, that time is money, so if you take longer you make less money, that’s why they do it the easy way.

The easy draw method of drawing is used everywhere, by everybody in the drawing industry but the only people not doing it, the easy way are people like you but lets be honest, your not in the drawing industry are you? You might like doing it, you might be good at it but you probably don’t do it the easy way because most people think, it is too easy and don’t consider it to even be drawing. These people are wrong, yes they are wrong because if you want to learn how to draw, then doing it this way, gives you a lot of good practical information, teaching you how to do it well by informing your visual memory, at the very least.

Doing it this way, also helps you to practice other important drawing skills, like shading, in a much easier way and much more quickly, than doing it the hard way, in fact doing it the hard way, mostly teaches you how to get it wrong by not giving you the correct visual information in the first place, making it much more difficult because you have to, at some point, undo all the learning you have gained, about doing it the wrong way.

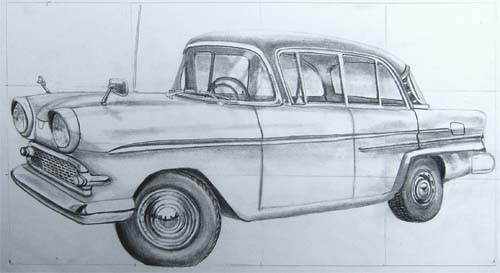
1950s Vauxhall Victor Grid Construction Drawing Showing The Grid Used.

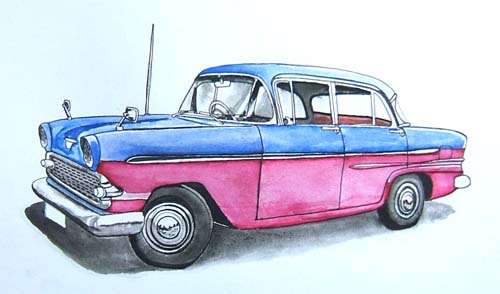
1950s Vauxhall Victor Drawing, Painting With Water Colors.

The other videos, are about showing you, other more conventional examples of how to draw with marker pens and watercolors, they show you different ways to draw, and it is always best to be able to draw in as many different ways as possible. The first two videos, show you how to practice seeing and getting the correct information, right from the start, giving you a good strong foundation, to build your drawing skills on for the future.

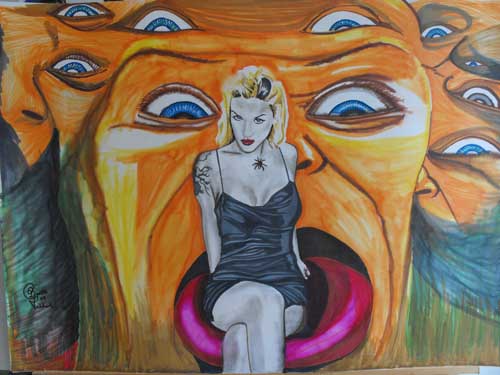
Girl on tong maker pens and graphite pencil drawing see it on YouTube.
Girl on tong maker pens and graphite pencil drawing see it on YouTube quickfirsts channel.

Plus take a look at this for speed painting, which is a term I do not really like because it is not really speed painting, it is merely speeded up video, which is something quite different, although it only took me an hour and 17minuets in total.

These methods will help everybody to learn how to draw easy step by step, just like the professionals do, all the time because its more about money than art or drawing, when you are doing it for a living.

PS. my son made the music on the last video and it’s not half bad.

Thank you, Gareth.

Single point perspective drawing.

The single point perspective drawing, is made up of a vanishing point, on the horizon line, where all construction lines, converge to give the impression of the object disappearing into the distance, as objects do, when we look at them in real life, this enables us to give our drawings, the impression of being three dimensional. Many illusions of depth, can be created by doing perspective drawing and most people find it very interesting, to do this type of drawing, in fact many people spend hours doing it because they can easily create, very dynamic 3D drawings, that look impressive.

How to draw perspective, using a single point, the most basic single point of all, can be done by putting a single dot or point, in the center of a piece of paper and then drawing perspective lines, from the center to the out side of the paper or drawing area, this then creates a single point perspective, if everything is then drawn in relation to these lines, it creates, the illusion of things, getting smaller, as they lead off into the distance, like they do in real life.

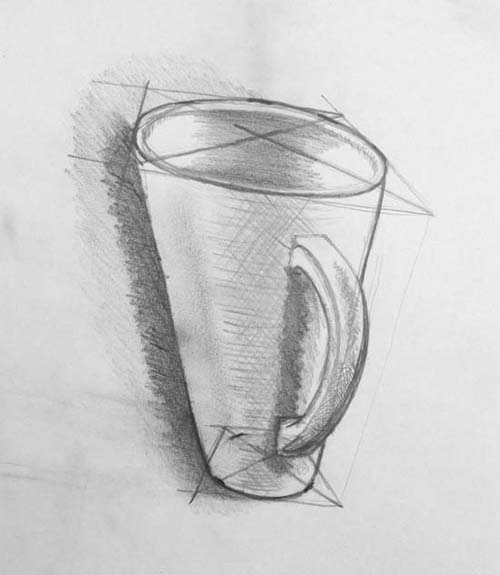
The drawing below, shows a distorted cup drawn in single point perspective, the cup looks distorted because the construction box, at the top and bottom, are on a slight angle, slanting down to the right, making it seem distorted.

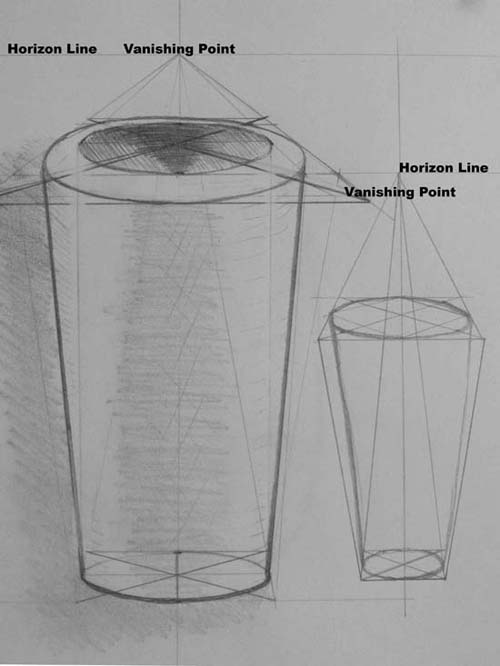
In the drawing further down the page, below, the construction boxes are drawn head on and the horizontal lines are drawn, fairly accurately spaced out from each other, top and bottom making the shape, seem correct and not distorted like the cup drawing directly below.  The other aspect of this drawing, is called an ellipse, which is the oval shape, made by circular objects, when looked at in perspective, this can be created by following the explanations in the drawings.

A single point persepctive drawing of a cup.The drawing below shows a more detailed explanation, of how to draw ellipses in single point perspective, the basic formula for this type of drawing is made by using an horizon line, which can also be called the eye line. The horizon line is mostly, just a horizontal line drawn across the paper, where your eyes, would be level with, when looking at the object and the perspective point, would be placed on this line so everything in the drawing, would converge on this single point, creating the illusion of perspective.

Single point perspective drawing with ellipse.

How to draw an ellipse in single point perspective.

Information sheet, how to draw an ellipse in single point persepctive, diagramatic.

The humble graphite pencil is a great tool to use, as a first place to start because of the many, cool effects you can develop and implement into your drawings with it, like mark making, notice the different types of shading in the drawings above. There is a combination of tonal modeling, hatching and cross hatching, which are the main types of mark making used in most drawings.

Also the graphite pencil, is probably the easiest tool to get your hands on, for doing drawing of all kinds, including the single point perspective drawing, like in the examples above.

The graphite pencil.

No education is neutral, that is fact, so the only way you can really find out is for yourself, drawing is a good way to do that and I would like to suggest, that we start with the faithful graphite pencil.

The pencil has been around for many years because it’s good to use, easy to hold for most people, even the oldest available drawing tool, other than the finger (charcoal) comes as a pencil nowadays.

It is interesting to understand, that what we think of as a pencil, is most often a graphite pencil and has many similar qualities as charcoal, it can be used in much the same way but the graphite pencil will produce, more tonal variation.

The good old graphite pencil, comes in many different measures of hardness or softness, which enables the user, to create many different qualities of line, as well as a very wide variety of tones, from almost black, to almost white and everything in-between. The softer pencils come in the B range, they are identified as, B to B9, with B9 being very soft and because of this, it dose not stay sharp for very long, consistent fine lines are more difficult, without a fine, sharp tip. If you watch a well practiced expert drawing, with a softer pencil, you will notice how often they turn it, between their fingers to change the drawing tip and keep it as sharp as they can, as long as they can. The other side of this is the harder pencils. These range from H to H9, with the H9 being very hard, they will stay sharp for a long time but will also gouge deep groves into your paper, if you press too hard, when drawing but can be useful, when shading very light areas of tone or creating effects.

The graphite pencil is very versatile, it has many different capabilities, that produce many different results, all of them worth knowing about and worthy of taking a look, or even a second look, even if you have been drawing for years.

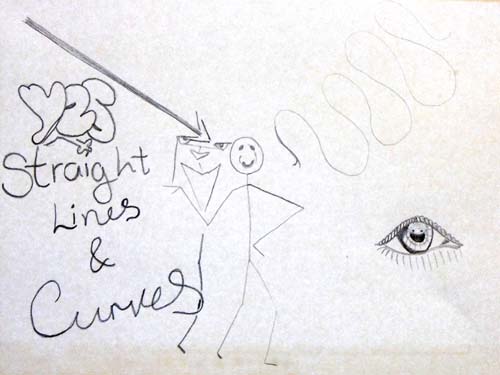
Everything we look at and see is a shape, that is often made up of other shapes, most of these shapes, change shape, when moved to different view points, this is the bulk substance, creating the three dimensional form of the shape. These can be created with two types of line, a linear or straight line and a curve. If you can draw these two types of line, you can draw, if you can draw stick figures you can draw. If you don’t draw more than stick figures, then you either don’t want to draw or don’t really know how.

The simple lines below, show some shapes and lines that can be drawn with a graphite pencil, it’s as it says, if you can write words, then you can draw straight lines and curves. If you can read then it’s even better and you’re lucky, because many people world wide, can’t.

A straight line and a curve, created a stick man.

Straight lines and curves, graphite pencil lines made with a 3b & HB pencil.

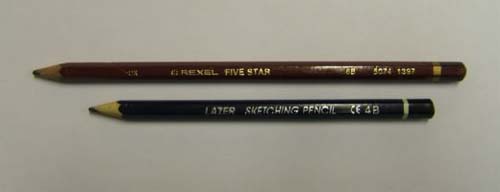
Graphite pencils 5b & 4b wooden type.

The simple lines above show, how simple it really is to draw lines and curves. None of them are outstanding, these lines have been made with HB and 4B, graphite pencils. But none of the full range of pencils, should ever be overlooked and as you can see, they are versatile, the lighter lines are with a HB, which is probably the most common of all and is a Hard Black, HB. Where as the darker lines, the word (yes), are made with a B4 pencil, which is in the B range of Blacks.

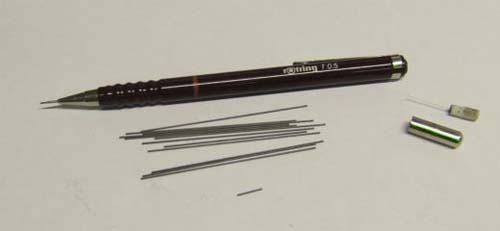
Mechanical Pencil with 3b graphite sticks.

Lets look at an exaggerated, three dimensional line drawing of a cup. These are common shapes using line and hatching to emphasize, the three dimensional form or shape of the cup using a 4B.

A single point persepctive drawing of a cup that is distorted.

You can also see the construction lines, drawn with a pencil, that where used to help create some of the out line or shape, using a single point perspective, this can also be used in a vertical direction to create a wheel shape.

Modern mark making, in the context of drawing, a point of view.

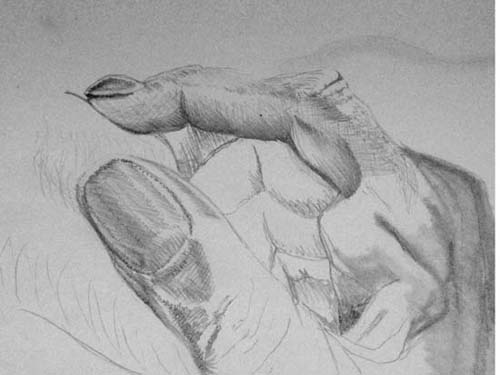
I took the charcoal drawing of a 1967, Austin Healey, 3000 Mk III, sports car and super imposed it into another image of a thumb and finger, using GIMP photo editing software, I fused them together to compose the image below, about understanding perspectives and using mark making, as a visual dynamic for tricking the eye.

Pencil drawing photo image of a thumb and finger.In the drawing above you will see two different pencil techniques, one is called hatching and the other is called tonal modeling, both are used often, as drawing techniques for different reasons mostly. The hatching or also called cross hatching technique, is often used to draw subjects, that lend themselves to that type of mark making, like hair, grass and other textures, that can be described with lots of little lines or dashes going all in one direction or differing directions, and is a natural way to use a pencil.

The other technique is tonal modeling, which is where the pencil is smudged or modeled using graded tones, to create soft edges and shadows, most often seen in the drawing of skin tone, and clouds but in the drawing above, you will notice that both are being used in the same drawing.

The finger and thumb of the hand is drawn using hatching and cross hatching, whereas the back of the hand is drawn using a tonal modeling technique. The example is used to show how these techniques, can be used in this way and although they lend themselves to best describe textures that have been mentioned, they can also be used effectively to describe textures, that would not really lend themselves to these techniques, like with the finger and thumb.

This is also an example of how you can take already existing drawings and with photo editing software, fuse them together as a means of generating new ideas, bringing very different tools together to aid the creative process.

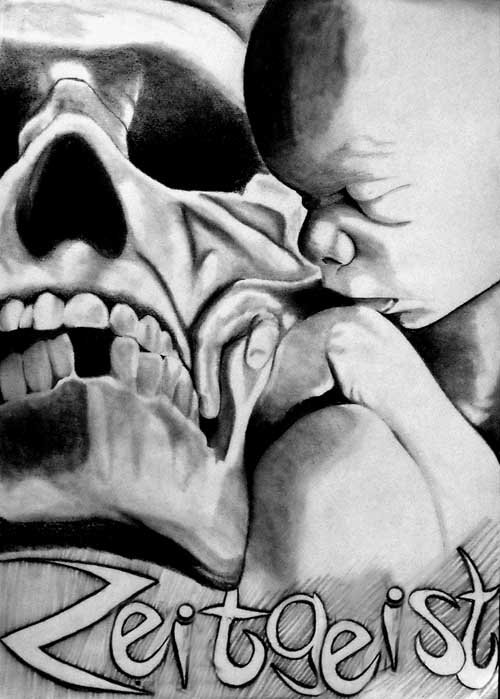
The image below, is almost completely created using tonal modeling and is a example of use, where it would accurately describe the fleshy textures of the baby’s skin tones, as well as, the bone textures of the skull, with the only hatching type marks, being around the word zeitgeist, which are again smudged pencil lines, with slightly modeled edges, that are not sharp or well defined. Mark making is also found in painting as well as drawing and is an important part of all kinds of art, where sometimes they are not lines, dashes or modeled areas but can be splashes, scribbles or pointillist type marks.

Zeitgeist, spirit of the times, pencil drawing.
The Zeitgeist, is the spirit of the times, this is a pencil drawing of life and death, called Zeitgeist .

A hand and the artificial creations, born from its great ability, to manipulate the world around it, isn’t all intelligence artificial because we only think we know, when we recognize the mark making?